This is what the whole screen looks like. In the top left, you see the preview window. Here, you can preview and edit clips before you put them into your finished video. The top right is where the current video timeline plays. The timeline is at the bottom right/middle. Once you preview a clip, you can drag it into the timeline to add it to your video. Once it's in the timeline, you can drag it around to edit where in the video it appears.
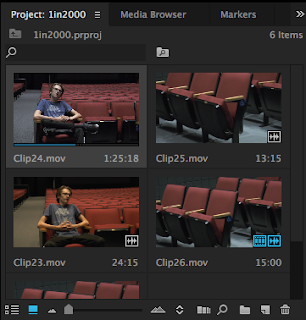
This is where the footage you imported will appear. From here, you can select individual shots before putting them into the final video. Double-clicking on the clips will open them in the preview window (top left in screenshot above). To organize clips before you put them in your video, you can put them into bins. Bins are like desktop folders, they allow you to put different clips in different places, so that you know where they are when you are ready to put them into your final video. Once you have edited clips in the preview tab, you go back to this area to click-and-drag the clips into the timeline.

Above is the timeline itself. Using the timeline, you can organize video and audio to create your final video. Also, you can use options along the top of your window to add effects to the timeline, like transitions between shots. Using the timeline is key, because you literally can't make a video without it. You can also use the scroll bars on the far right to change what you see in the timeline. In this screenshot, it's just a few bars. But if you adjust the scroll bars, you can see frames of the video, and the audio levels as the video plays.
If you still have any questions about how to use anything in Adobe Premier Pro, you should go find other tutorials, because I'm still learning how to use this too. Good luck!


No comments:
Post a Comment