Monday, December 19, 2016

Animation-Semester Reflection

Walk Cycle:
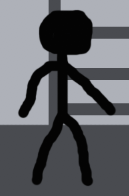
  Another project from this year is the walk cycle. It consists of a robot walking across the screen. Yep, that's it. We drew something, scanned it into the computer, put the pieces together, then made it move. We used Adobe After Effects for this project, and for every 2D animation. Making it move was easy, but I can't draw to save my life. it looked like it was drawn by a five-year-old. I would have include the project, except the video isn't uploading to Blogger.

Multi-Plane:
  Using different layers from Photoshop, I was able to create a multi-plane animation. Rolling hills, trees and bushes going by, like driving by on the highway. The farthest layers moved more slowly, just like it looks in real life. The hardest part of this project was again, drawing. It took more time to draw it all out than it did to export out of Photoshop, import into After Effects, reorganize them, put them into a timeline, reorganize them in the timeline, make them move, and export the final project. Just like the last project, the video won't work, so you're stuck with my description.

Castle:
  This was the first project made in MAYA, a 3D animation program. It was a quick way to learn how to use the program, and get some experience using it at the same time. The castle had to consist of four towers, four walls, an entrance, a flat plane, and color. Mine included all of the requirements, but some of my classmates went a little over the top.


Hammer:
  Hammers are common in homes. They are useful tools, capable of putting things together or tearing them apart. But in animation land, they're nothing but a collection of polygons thrown together. The hammer was supposed to be an easy project, but nothing was working right. When I tried to round the handle, random extra planes stuck out the side. And when I tried to delete these extra planes, the whole handle disappeared. The head worked well, at least to an extent. The claws were fine and easy to adjust. They stayed in place and they're really the only part of the project that turned out perfectly. The rest of the hammer wouldn't cooperate and screwed up horribly when I tried to fix it. Plus, the lighting's not great, and I had no idea how to fix it when I was making this.


Ice Cream:
  The Ice Cream animation went well. All of the polygons did exactly what they were supposed to, the textures worked well, the lighting was decent, and the rendering was smooth. This project was probably one of the top two among my best projects this year. All of the images rendered beautifully, and the animation process went well. This project was made in MAYA, then a series of images were taken. These images were transferred to Adobe After Effects, where they were put into a timeline as a full animation. Overall, I was very pleased with this project, but I probably could've tried to make the chocolate ice cream look a little less like poop.

Friday, December 16, 2016

Video Production-Semester Reflection

  This year in e-Comm I learned plenty. Many of the skills I learned last year in e9 carried over into this year. The six-shot system, three-point lighting, editing, and audio skills all carried over into my experience this year. So far, we have studied convergence journalism. We have made several videos, including two feature stories. Not the most creative titles, but they were called "Feature Story 1" and "Feature Story 2".
Feature Story 1:
  The first feature story I made was about my classmate Austin Wilson and his involvement with the school play. He was the only sophomore in the pit orchestra for our school's musical. The video consisted of him playing some of the music and talking about everything that he did. It was pretty easy to film, but some of the footage disappeared from the SD card. And the fact that I missed three days of class prevented me from getting it in on time. So while it wasn't the easiest project, it certainly gave me some experience to carry into the second feature story.
Feature Story 2:
  The second feature story I made was about my best friend TJ Dahl. The video was about his volunteer work at our church. Every Sunday morning, he goes early and does any odd job that needs to be done around the building. I was originally going to film him talking about it at our church, but I forgot my SD card, forcing me to wait and do it later at his grandparents' house. However, I was able to get footage of us working thanks to an extended due date and my personal "GoPro rip-off". It was a little rough at times, but it was by far my favorite story to shoot, considering I got to spend time with a friend in the process.
Class time:
  Most of my class time was used to edit or film videos, but I had some free time. I've been a perfectionist since the day I was born, and I spent most of my time in class trying to make my videos look as good as they possibly could. While this was often frustrating due to poor lighting or camera issues, I made some quality videos and cranked them out in record time. There were a few videos that we filmed in class, so that time was completely devoted to trying to make the cameras work. Outside of class I watched news stories and movies. Not as entertainment, but to try and figure out how everything was done. When I watch movies, I watch them for entertainment and I try to find errors. Whether that be continuity, grammar, statistics, or special effects, I always try to find something that could be fixed. For example, there is a scene in Jurassic Park when two velociraptors follow children into a kitchen. As the velociraptors enter, they stop. One starts to lean forward, then it stands up straight again. This looks completely normal, but if you look closely, the model dinosaur used in shooting was actually about to fall on its nose. A crew member's hand comes up into the shot and lowers the raptor's tail down, bringing its head back up. Against the dark shadows of the doorway, this is not something you would spot unless you were looking for it.
Video Skills:
  This year, I've gained many new skills. Rather than editing in Final Cut Pro, this year we used Adobe Premiere Pro. Many of the concepts and controls are the same, but it is a different layout, so we had to practice a little bit. An area I may need to improve in is filming. While it seems really easy, I often forget to check the lighting, natural noise, and anything else that's going on in the background.
Summary:
  What did I love most about this semester? I don't know. I love video production, whether for journalism or entertainment. I already know that I'm going to choose video over animation next year. I don't think I would change anything from my experiences at e-Comm. This is a fantastic program, and I hope that I'll be able to finish my high school career with it. I don't have any goals except to continue my amazing experience in this program.

Thursday, December 15, 2016

Technical Tutorial-Using MAYA

  MAYA is a great program for people who want to try 3D animation, but it can be confusing. There are so many things this program can do, it gets overwhelming, confusing, annoying, and straight up stupid. But this tutorial will tell you some of the easiest things you can do in MAYA. 

  This is the top bar. It is the main hub for operations and controls when using MAYA. Right now, it's in the "Polygons" tab. Selecting different tabs will allow you to create different things. After creating objects, you can change them and fit them together to form larger projects. You can also add color to your creations by selecting them, then holding down the right-click and dragging down to "Add favorite material". A box will appear to the right. Keep holding down on the mouse and drag over to select one of the options. The option "lambert" is just a normal color. "Blinn" is a little bit shinier and reflective. "Phong" is for really shiny things. 

  This is what the whole screen looks like. You can adjust it to make your workspace bigger or smaller. The project on the screen now is my semester final. We had to choose a pen from our backpacks, then make it in MAYA. It's still a work in progress, but overall, it's pretty close to being finished. This is incredibly small and insignificant compared to some of the things you can make in MAYA, so go ahead and try it out. You won't be disappointed. 

Wednesday, December 14, 2016

Professional Project Review-The Incredibles

  There are plenty of great animated movies out there, and animation companies have learned to capitalize on this popular industry. Such is the case with the hit movie from 2004, The Incredibles. The Incredibles pits a family of superheroes against a genius supervillain that has created an ever-learning robot. Using their family teamwork and their superpowers, they save the city. The animation itself was well done, an example of Pixar's great work over the years. One thing that was done well was the fight scenes. They were clear and it was easy to see what was going on. There isn't much about this movie that could be improved.

Professional Article Review - Animation

  In the article "Yes, as a Matter of Fact. You Do Need to Learn 3D.", on lynda.com by Starshine Roshell, the article gives several reasons why you should learn 3D animation. The author tells the reader what our culture wants to see, what 3D animation is used in, and how to train yourself to see in a 3D perspective. The article tries to convince readers that 3D animation is useful, and that they need to take the lynda.com tutorials. While the article is more of an advertisement, it is in article format and does present some points as to why 3D animation is important.

Monday, December 5, 2016

Feature Story 2

  In my video production class, we had to make two feature stories. This one was about my friend TJ Dahl. The story was about his volunteer work at our church. He talked about the numerous tasks that he does around the church, and there are scenes of him working. 
  The narrative lead is an important part of any feature story, and I actually recorded mine after I made the video. This helped me to know how I wanted to begin the story, and what I needed to say to make that happen. 
  First, I interviewed TJ himself to talk to him about everything that he did on Sunday mornings. He gave details about what he did, who he worked with, when he started, and when he went. After that, I interviewed TJ's mother Danna. She talked about how she also volunteered at the church, but rather than doing odd jobs, she works with the high school students. 
  Shooting the video was pretty simple. Occasionally, the lighting wouldn't work well, or the focus on the camera was off, but other than that it was easy. Setting up the camera, adjusting the zoom, and clicking a button. It's pretty easy. Editing was just putting the clips into a sequence that I liked.
  The feedback from my classmates was mostly suggestions, and I listened carefully. I ended up changing the entire sequence of my video based on one little suggestion. It just goes to show you, every little detail counts. 

Friday, November 18, 2016

What makes a good feature story?

  When you watch a feature story on the news, it can be captivating. An inspiring story about a blind man who kayaked an entire river, a long-lost child returning home, some stories just give you a warm and fuzzy feeling. But why do the stories do this? What makes you want to cry, laugh, or cheer? What makes a good feature story?
  The first thing that you need when creating a successful feature story is a good topic. Obviously, the topic must be something interesting, otherwise no one will care. For example, a blind man kayaking the entire length of the colorado river is a great story that would inspire people. No one would want to hear a story about a little kid who dropped his ice cream.
  Making sure you get good footage is one of the most important things when making a feature story. Footage of the activity or topic that you are talking about is imperative. When the footage relates to what you're talking about, the viewers are more interested.
  As with any film, you want to have good lighting and sound. There needs to be enough light that you can see, but not so much that the glare blinds the camera. On the same note, a little bit of natural noise is welcome, but too much overpowers your voice-overs and leaves your viewers confused.
  An effective voice-over is another important part of creating a feature story. A voice-over can introduce a topic, transfer a viewer's attention to a new part of the topic, and end the feature story on a high note. Voice-overs keep your viewers interested, and they can be used to articulate an unclear part of the story. Also, they are often used to explain what the person in the story may be talking about, as putting the creator of the feature story is considered unprofessional.
  These are good things to do when creating a good feature story. Remember, if the video is too long, the viewers may lose interest. Try to keep it as brief and concise as possible.

Friday, November 11, 2016

Story Animation

  The latest 2D animation from my animation class required a story. There needed to be a plot, action, and a walk cycle. After creating storyboards for our animations, my class began to work. The creation process began in Adobe Photoshop. Characters, backgrounds, everything was crafted and colored to fit each person's needs. Each layer was perfected, then the work was moved to Adobe After Effects.
  Adobe After Effects was the program used to put the animation together. Each layer was placed in its position, then moved throughout the animation. Some things could be moved with the use of key frames, while some objects needed to be moved with puppet pin tools. I included a stick figure in my animation, and I used puppet pin tools to move it. My robot's legs were moved with the use of key frames. I set the legs in a position, then created a key frame to make the legs be in that position at the selected time. After a full cycle, I copied and pasted the key frames to make the walk look consistent.


  The final animation wasn't the best. The concept was supposed to be that the robot was a ghost, or a hologram, or something. But nobody seemed to get that. They just figured I did a bad job. And while it wasn't as obvious as it could've been, I'm still learning this, I don't know how I could make it any clearer, and they probably should've been able to figure it out. Some of my classmates started pointing out stuff that was wrong with it, but I did those things on purpose to try and make it look like the robot was a ghost. Yes, there were things that I could have done better, but overall, most of the criticism was based around a false assumption. And at least something happened in my animations. There were some animations where the entire scene was a badly drawn blob walking for 30 seconds. If I had more time, I would have concentrated on the details a little bit more rather than just focusing on finishing.

Thursday, November 10, 2016

Feature Story Experience

  The concept of my feature story was fellow classmate Austin Wilson's involvement in the school musical. He is the only sophomore in the pit orchestra for the musical. Filming the video was simple. I set up the camera, asked the questions, and recorded the answers. I also recorded him playing a few pieces from the music he has to practice. I put all of the clips together and imported some voice overs, and that was the video. Typing it was even more simple. I just listened to the video and typed all of the words that were said, along with some commentary.

Friday, October 28, 2016

Intro to MAYA-Castle

  Recently in animation, my class has been learning to use MAYA a 3D modeling program. To help us hone our skills, we were instructed to build a castle. We used cylinders to build the towers, then selected certain sections of it and deleted them, creating something that actually looks like a castle watchtower. Next, we duplicated the tower until we had created four of them. We moved them to positions that we liked before moving on to the walls. I simply typed in X,Y, and Z coordinates to place each one at the exact corners of the plane.

  To make the walls we built a rectangular prism, then sized it to fit our needs. After creating divisions in the wall, we cut out every other section to create the battlements. After the first wall was complete, we duplicated it and positioned all four walls between the four towers. Personally, I positioned mine on the border lines of the plane. This made it a lot easier, and I could simply type in X,Y, and Z coordinates instead of moving each wall to the perfect place by hand.

   For the entrance, we formed a cylinder, combined it with a cube. Then in the Mesh Tab, we used the union tool to join the two items together. Then we inserted it into the wall. We then used the Difference tool in the Mesh tab. This erased the cylinder, cube, and the section of the wall that we put it in. This created a clean archway that serves as the entrance to the castle. Realistically, there would be a portcullis (the metal gate that is pulled up away from the entrance or dropped down to block invaders), but it wasn't a requirement and we hadn't learned a quick way to do that yet.

  Color is an important part of animation, so naturally it was one of the first things we learned. To add color to a shape, simply add a lambert or blinn. Giving each object's blinn or lambert the same title will allow you to change every similar object's color at the same time, and it will be the exact same. Giving objects' lambert/blinn will allow for individual color change. I put down a flat plane inside my castle and colored it green. I named its blinn "The Ground". The walls and towers all had a lambert named "lambert1", so they all changed color together. Initially, shapes will appear as a light grey, but you can change them all you want.


  My castle consisted of all the requirements. Four towers, four walls, a doorway, a flat plane, and color. Some of my classmates went a little further, adding extra towers, more walls, and much more detail. But I'm not the creative type. I do what needs to be done, and nothing more. You do have the option of adding extra detail, and many of the same techniques used here will help you do that. But I didn't have the time. So go ahead and explore MAYA, there's a lot you can do with it. 

Monday, October 3, 2016

How to Organize Clips in Adobe Premier Pro

  Making a video doesn't just include filming, it requires the ability to edit the footage. Editing your video is a key part of making it good, and this tutorial will show you how to do it in Adobe Premier Pro.
This is what the whole screen looks like. In the top left, you see the preview window. Here, you can preview and edit clips before you put them into your finished video. The top right is where the current video timeline plays. The timeline is at the bottom right/middle. Once you preview a clip, you can drag it into the timeline to add it to your video. Once it's in the timeline, you can drag it around to edit where in the video it appears.
 

  This is where the footage you imported will appear. From here, you can select individual shots before putting them into the final video. Double-clicking on the clips will open them in the preview window (top left in screenshot above). To organize clips before you put them in your video, you can put them into bins. Bins are like desktop folders, they allow you to put different clips in different places, so that you know where they are when you are ready to put them into your final video. Once you have edited clips in the preview tab, you go back to this area to click-and-drag the clips into the timeline.


  Above is the timeline itself. Using the timeline, you can organize video and audio to create your final video. Also, you can use options along the top of your window to add effects to the timeline, like transitions between shots. Using the timeline is key, because you literally can't make a video without it. You can also use the scroll bars on the far right to change what you see in the timeline. In this screenshot, it's just a few bars. But if you adjust the scroll bars, you can see frames of the video, and the audio levels as the video plays. 
  
  If you still have any questions about how to use anything in Adobe Premier Pro, you should go find other tutorials, because I'm still learning how to use this too. Good luck!

Tuesday, September 20, 2016

1 in 2000-Keenan Capps

  Every single one of the 2000+ students at Olathe Northwest has a story. In my Exploring A/V class, all of the students interviewed each other. We found out what our classmates' stories were, and specifically, what they did over the summer. For my interview, I talked to Keenan Capps about what he did over the summer. As it turns out, he had gone to Chicago with his parents just before coming back to school. In the video, he talks about his experiences and why he loved the trip. This is just one example of a normal student with an extraordinary story. Every student at ONW has a story like this, it's just a matter of finding it.

  This video project required a 15-second voice-over. When writing the script for the voice-over, I tried to think of something to say that wouldn't sound corny or robot-like. I tried to say something that would relate to people. I hope I succeeded.

  Making this video wasn't hard. Keenan and I got permission to go into the empty auditorium, and we set up the camera there. I sat on the stage and set the camera next to me, and Keenan sat in the first row of chairs. There were some times where we got off topic, so I did have to edit the footage, but I didn't change anything major. I made the video itself, then imported my voice-over into the beginning.


Thursday, September 8, 2016

Personal Project Review

This is the first blog of my Sophomore year in e-Comm, and I have to review my own project. My video was about walking in the hallways. The main character gets tripped, someone helps him. It's pretty simple, the message is to just be nice. I tried to make the shots flow together, and the music sets the mood nicely. Some of my classmates told me that I needed different lighting, but it was a high school hallway during class. There was nothing I could do about it. Also, people told me that the video was shaky, as if I had neglected to use a tripod. Well, I didn't use a tripod. My classmates checked all of them out before I could get one. Again, nothing I could do about it. Overall, I think I did a nice job, considering the restrictions of a high school class.


https://youtu.be/jk1DnGbauK4


Monday, May 16, 2016

Freshman e-Comm Final Reflection

 This year in e-Comm I learned plenty of technical skills. I learned how to edit video footage in Final Cut Pro, use Adobe Illustrator and Photoshop, animate in Photoshop and SketchUp, and create a website using Adobe Dreamweaver. Over the course of the year, I created: 3 videos,  5 graphic design projects, 7 animations, and 3 websites. These were made before the final project. I learned that I like video production and animation better than graphic design and web design. In video production, we learned the fundamentals of filming and basic editing skills. In graphic design, we learned how to use Adobe Illustrator and Photoshop. Using our new knowledge of the programs, we created a variety of projects including: a creative color wheel, photoshop images of our school, and personal logos. In animation, we learned how to make animations in Adobe Photoshop. Using different shapes and layers, we created multiple short animations. We then used SketchUp to create 3D objects and we learned to create animations with that program as well. Throughout the year, we created several websites, and learned the basics of web design. Overall, my first year in e-Comm was great. I learned plenty of new skills, and I developed a love of being behind a camera. With 3 years left, I can only wonder what new skills I’ll attain in the years to come.

-Jackson Chien

Friday, May 13, 2016

My Contributions to Our Team


  This is a coupon that I created for our team's final project. Our team ended up modifying it for the final product, but this was the starting design. I also created the outdoors landscape for our animation, which we ended up not even using. I filmed all of the footage in our videos, even though we only used one video for the final website.

Friday, March 11, 2016

Invasive Species Website

In my e9 class, I made a website about invasive species. I used Adobe Dreamweaver to make the website. The website has a home page and several pages for information about different invasive species. Here are screenshots of two of the pages.


Wednesday, March 9, 2016

Sketch-Up House


This is a house that I made in my e9 class. It would've had some decorations, but I missed 3 days of class. Some of my classmates added garages, trees, and a bunch of other random stuff, but I got stuck with a car.

Wednesday, February 10, 2016

SketchUp Doghouse


This is a doghouse that I created in SketchUp. I used different shapes, then molded and colored them to make them look a little bit better.

Tuesday, February 9, 2016

SketchUp Dining Room


This is a graphic of a dining room I created using the program SketchUp. I used different shapes, then morphed them to fit my needs.

Friday, January 29, 2016

My Name Animation


I learned a lot in e9 this year. The basic aspects of video production, basic graphic design, and how to animate in photoshop. I am most interested in video and animation, so I'll choose those to take next year.

Monday, January 25, 2016

10 Words Animation


This is a short animation of 10 words that describe me. This time, when I made the animation, I used a video timeline instead of a frame animation. While frame animations specify what is where at one point in time, video timelines allow you to choose where something is at a point in the animation, then the computer automatically makes the object move.

Friday, January 15, 2016

Good Intro to Animation

These are some basic tutorials about a few principles of animation: squash and stretch, arcs, and ease in/ease out.

Idea Rocket Intro to Ease In/Ease Out


Wednesday, January 13, 2016

Bounce 2


This is my second bouncing animation. This time, instead of bouncing straight up and down, the face bounces across the screen.

Monday, January 11, 2016

Bounce Animation


This is my first animation project for my e9 class. I used photoshop to make different layers, and used the timeline to put them in a sequence that would make them look like one constant movement. Using gradients makes it look better, but they wouldn't work. It is also an option to put in a background, maybe some clouds, but I liked it better this way.